Recently I finished up some shell functions that help me with some common git and testing workflows. They are up on Github, but I wanted to call them out since they might be helpful to others and just making something open source does not mean that it is discoverable. I think the philosophies are pretty solid even if you use different tools. You could use similar functions if you are using Bash or ZSH.
Overview
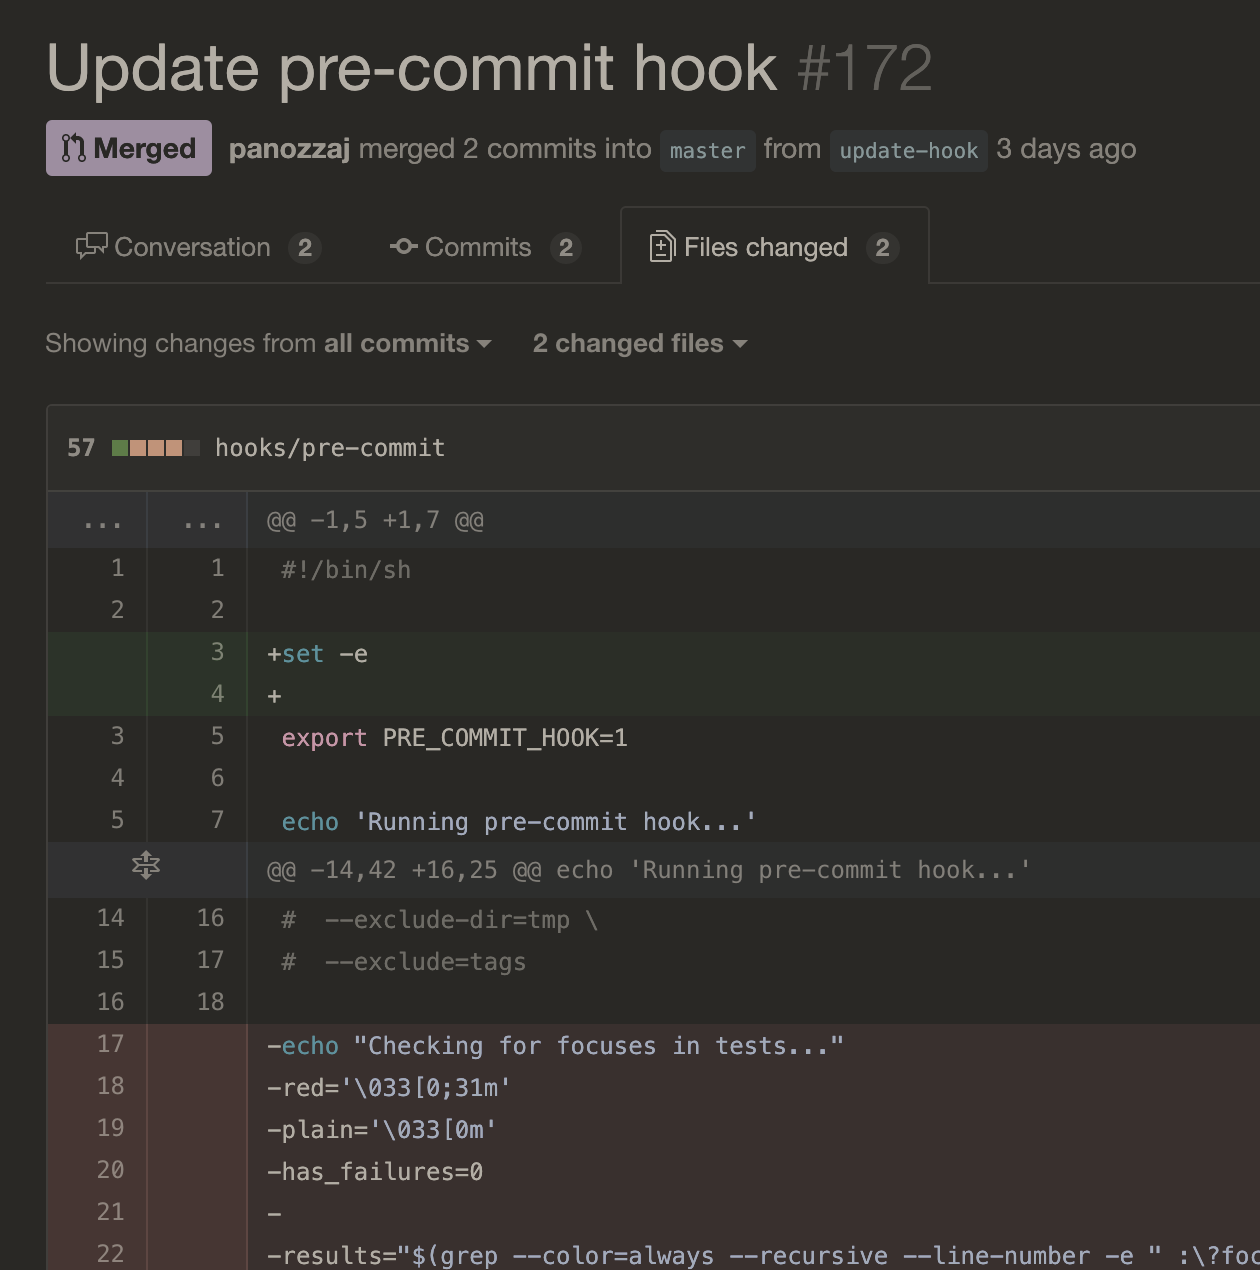
The general problem that I am trying to solve is that different tools like RSpec, git, or RuboCop produce output in a certain format, and I often want to do things with that output. For example, I might want to re-run the RSpec tests that just failed so I can verify fixes more easily. However, RSpec outputs in a certain format that is not easily consumable. For example:
...
Failed examples:

rspec ./code/fail_spec.rb:2 # something failed
rspec ./code/fail_spec.rb:8 # yet another failure
...
If I want to re-run these two tests, I could copy the two lines and paste into my terminal. This would have a couple of downsides though. One is that I would need to spin up one RSpec process for each test that failed. This is time-prohibitive if the project loads the Rails environment. It also prevents me from getting a reliable list of the tests that failed so I can repeat this process. Last, I'd like to ideally use a faster test runner like Zeus or Spring. So my real goal is to re-run the failing tests as quickly as possible.
One approach that I took for a few years was to copy the output, paste it into an editor (Vim), and then do some macros or other commands to munge it into the format that I want. However, this is time-consuming and potentially error-prone. It is also usually wasteful since I need to do it each time that I want to transform the output to a particular format, and often I don't have the editor macros saved. It can be nice to have the list of tests to retry in an external editor to be able to check them off, but I prefer to not need the intermediate step.
Solution
The specific solution I made to solve this problem was to create a shell function that I called respec:
# copy the rspec failures, and this will rerun them as one command
function respec() {
  pbpaste | \
    cut -d ' ' -f 2 | \
    sort | \
    xargs rspec
}
First, I manually copy the tests that I want to run again. Using iTerm2, it is as simple as selecting the failure summary text since selections are automatically copied to the clipboard. pbpaste then echos the contents of the system clipboard. From there, we want a list of the tests that failed so we can run them again. The format of failing tests are: