I spent a little time during the last week figuring out ways to debug HTTPS issues locally, and wanted to share. My end goal was to run HTTPS with valid wildcard SSL certificate on a Rails server locally (most of this is not Rails-specific.)
Why this is useful
I wanted to do this so that I could see which pages had partially insecure content or looked incorrect when using HTTPS. If your “secure” page loads a stylesheet or image or JavaScript file in an insecure manner, you could leak private user information, etc. You can see whether you are really secure by looking in the URL bars of modern browsers.
However, we only had a valid SSL certificate in production for a client project that I was working on. If I tried to look at the staging server or a local server with HTTPS, I would get a pretty ugly error and the browser would just tell me that the certificate was not accepted. Plus, I wanted to be able to make changes and see the effects locally without needing to push to staging (increasing the feedback loop speed is always high on my list of priorities.)
Setting up the SSL certificate
I followed the instructions at Heroku’s Self-Signed SSL Certificate post. I created a script which looks like this (to automate):
#!/bin/sh

# See https://devcenter.heroku.com/articles/ssl-certificate-self for overview

ssl_dir='ssllocal'
mkdir -p $ssl_dir
openssl genrsa -des3 -passout pass:x -out $ssl_dir/server.pass.key 2048

# be sure to use *.lvh.me as the common name, allows us to hit admin.lvh.me, etc.
openssl rsa -passin pass:x -in $ssl_dir/server.pass.key -out $ssl_dir/server.key

rm $ssl_dir/server.pass.key
openssl req -new -key $ssl_dir/server.key -out $ssl_dir/server.csr
openssl x509 -req -days 365 -in $ssl_dir/server.csr -signkey $ssl_dir/server.key -out $ssl_dir/server.crt
A bit of explanation: you are going to be generating keys into an ssllocal directory. Presumably this would be inside your Rails app, although if you used it for multiple apps, you could put it somewhere else. The openssl-related lines are just creating the keys, and I pulled all of that from the Heroku post.
Pointing to lvh.me will redirect you back to 127.0.0.1. This might not seem all that useful at first, but you can also use subdomains. So www.lvh.me will work in a way that www.localhost or www.127.0.0.1 will not. You could change your hosts file for each subdomain, but some sites have dynamic subdomains (consider one for each customer.) For my case this was the situation, so I needed to find a solution to create an SSL certificate that would work across all subdomains. I found Justin’s explanation of using wildcard subdomains, which says to be sure that you pass *. before the domain name to resolve any subdomains. I think that this will result in not being able to hit multiple nested subdomains with SSL (say, foo.bar.baz.lvh.me), and naked domains (you’ll need to use www.)
Running a local server with SSL
Next, you need to run a server with SSL. I used thin, with the command:
thin start --ssl --ssl-key-file ssllocal/server.key --ssl-cert-file ssllocal/server.crt
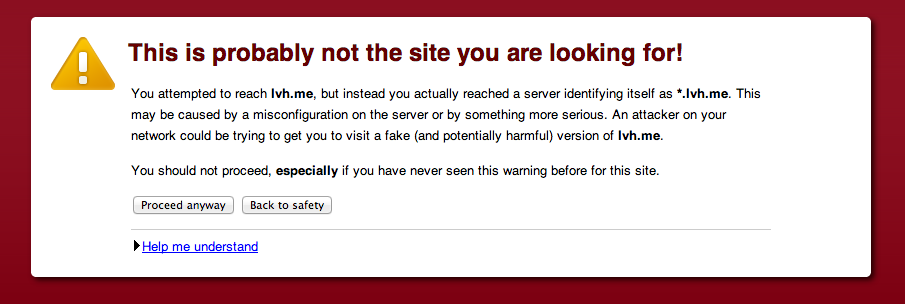
This says to use SSL, and to use the key/certificate that we generated above. Standard HTTP connections will not be allowed, and HTTPS ones will be. Next, hit the server by going to https://www.lvh.me:3000. You should be greeted with the standard error message when you are presented with an invalid certificate:

Trusting the self-generated certificate
Now you want to tell your computer/browser to trust your certificate so you don’t get the error message when you hit the page. Without doing this, mixed content issue will be masked, since the browser will only tell you that there is a huge error with SSL. Since I’m on a Mac currently, I found this article quite helpful for downloading the certificate and trusting it, and I recommend following it closely.
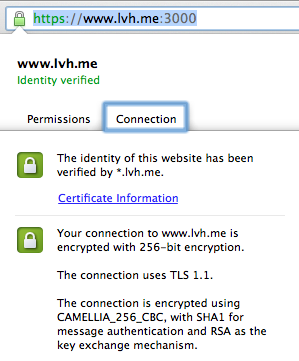
When you are done, you should be able to hit the server again (probably after restarting your browser) and see:

Cleaning up
To find issues with my site, I looked around at the browser and when it didn’t have the secure lock, I looked in Chrome’s developer tools to figure out what the offending resource was. In my case, I needed to tell Paperclip to use the secure version of images stored on S3, and generally changed any other includes. One helpful tip is that you can remove the protocol of a resource so you don’t need to check whether you are using http or https.
The generated key files are still around, you may want to git ignore those
If you later try to access localhost from a HTTP URL, your browser may remember the HTTPS setting. In this case you need to clear cookies for localhost.
This solution worked for me and I’d be interested in hearing if there are ways around some of the edge cases with subdomains.